
Six Watercolor Tips You Should Know Before Starting
You can either watch the video, or read the text below. Both options contain the same content.
During my local watercolor workshops in Annecy, I love sharing easy tips that are super useful but often get overlooked. These are little lessons I’ve learned the hard way, and honestly, they make watercolor even more exciting.
So today, I’m sharing 6 simple tips that I think you’ll love. Let’s dive in!
Tip #1: start easy with solid paints
I highly recommend using solid paints like this tiny palette. They’re super easy to use, portable, and dry out between uses. Perfect for beginners!

Tip #2: wake up the colors with a spray
Solid watercolors can feel dry and tricky to use at first. A small spray bottle can help you to mist your palette before you start. Such a small step, but it really makes a difference!

Tip #3: use water wisely
Water is key for wetting your brush, cleaning it between colors, and diluting your paints. It’s the most important tool in watercolor.
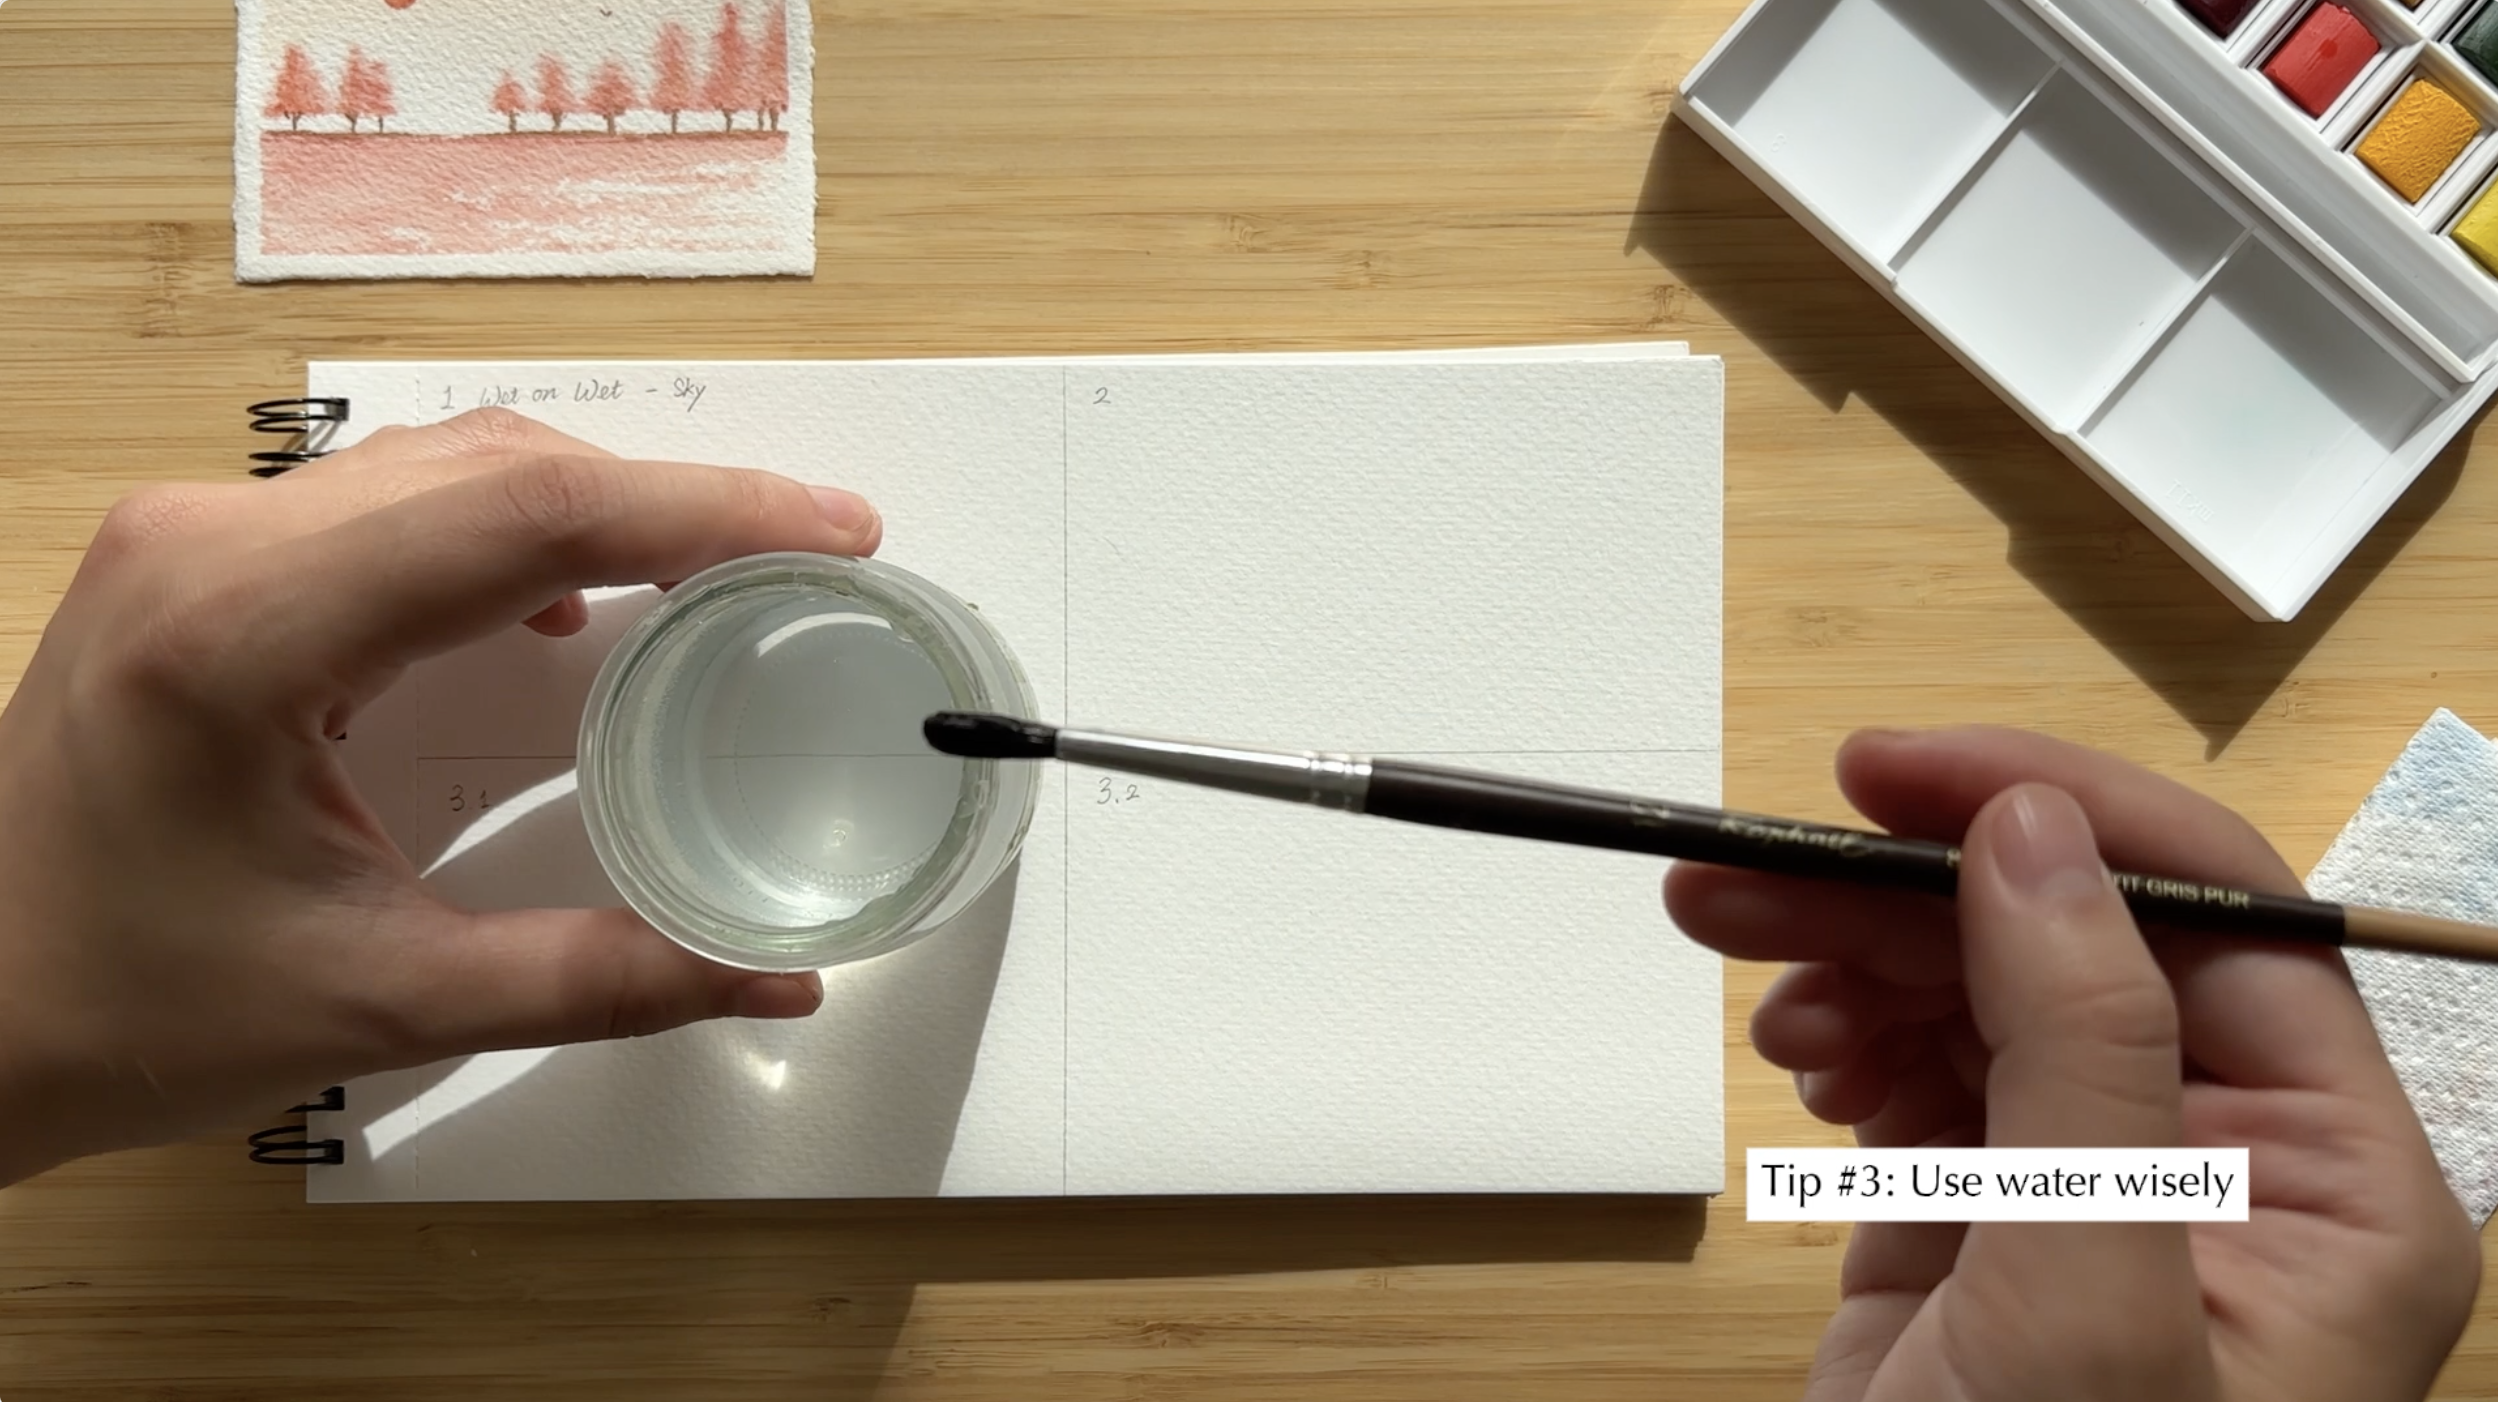
#3.1: Use water for soft blend
Sometimes, you’ll want to wet the paper first before adding color. This technique creates beautiful, soft blends where the colors melt into each other. It’s one of the things that makes watercolor so magical.

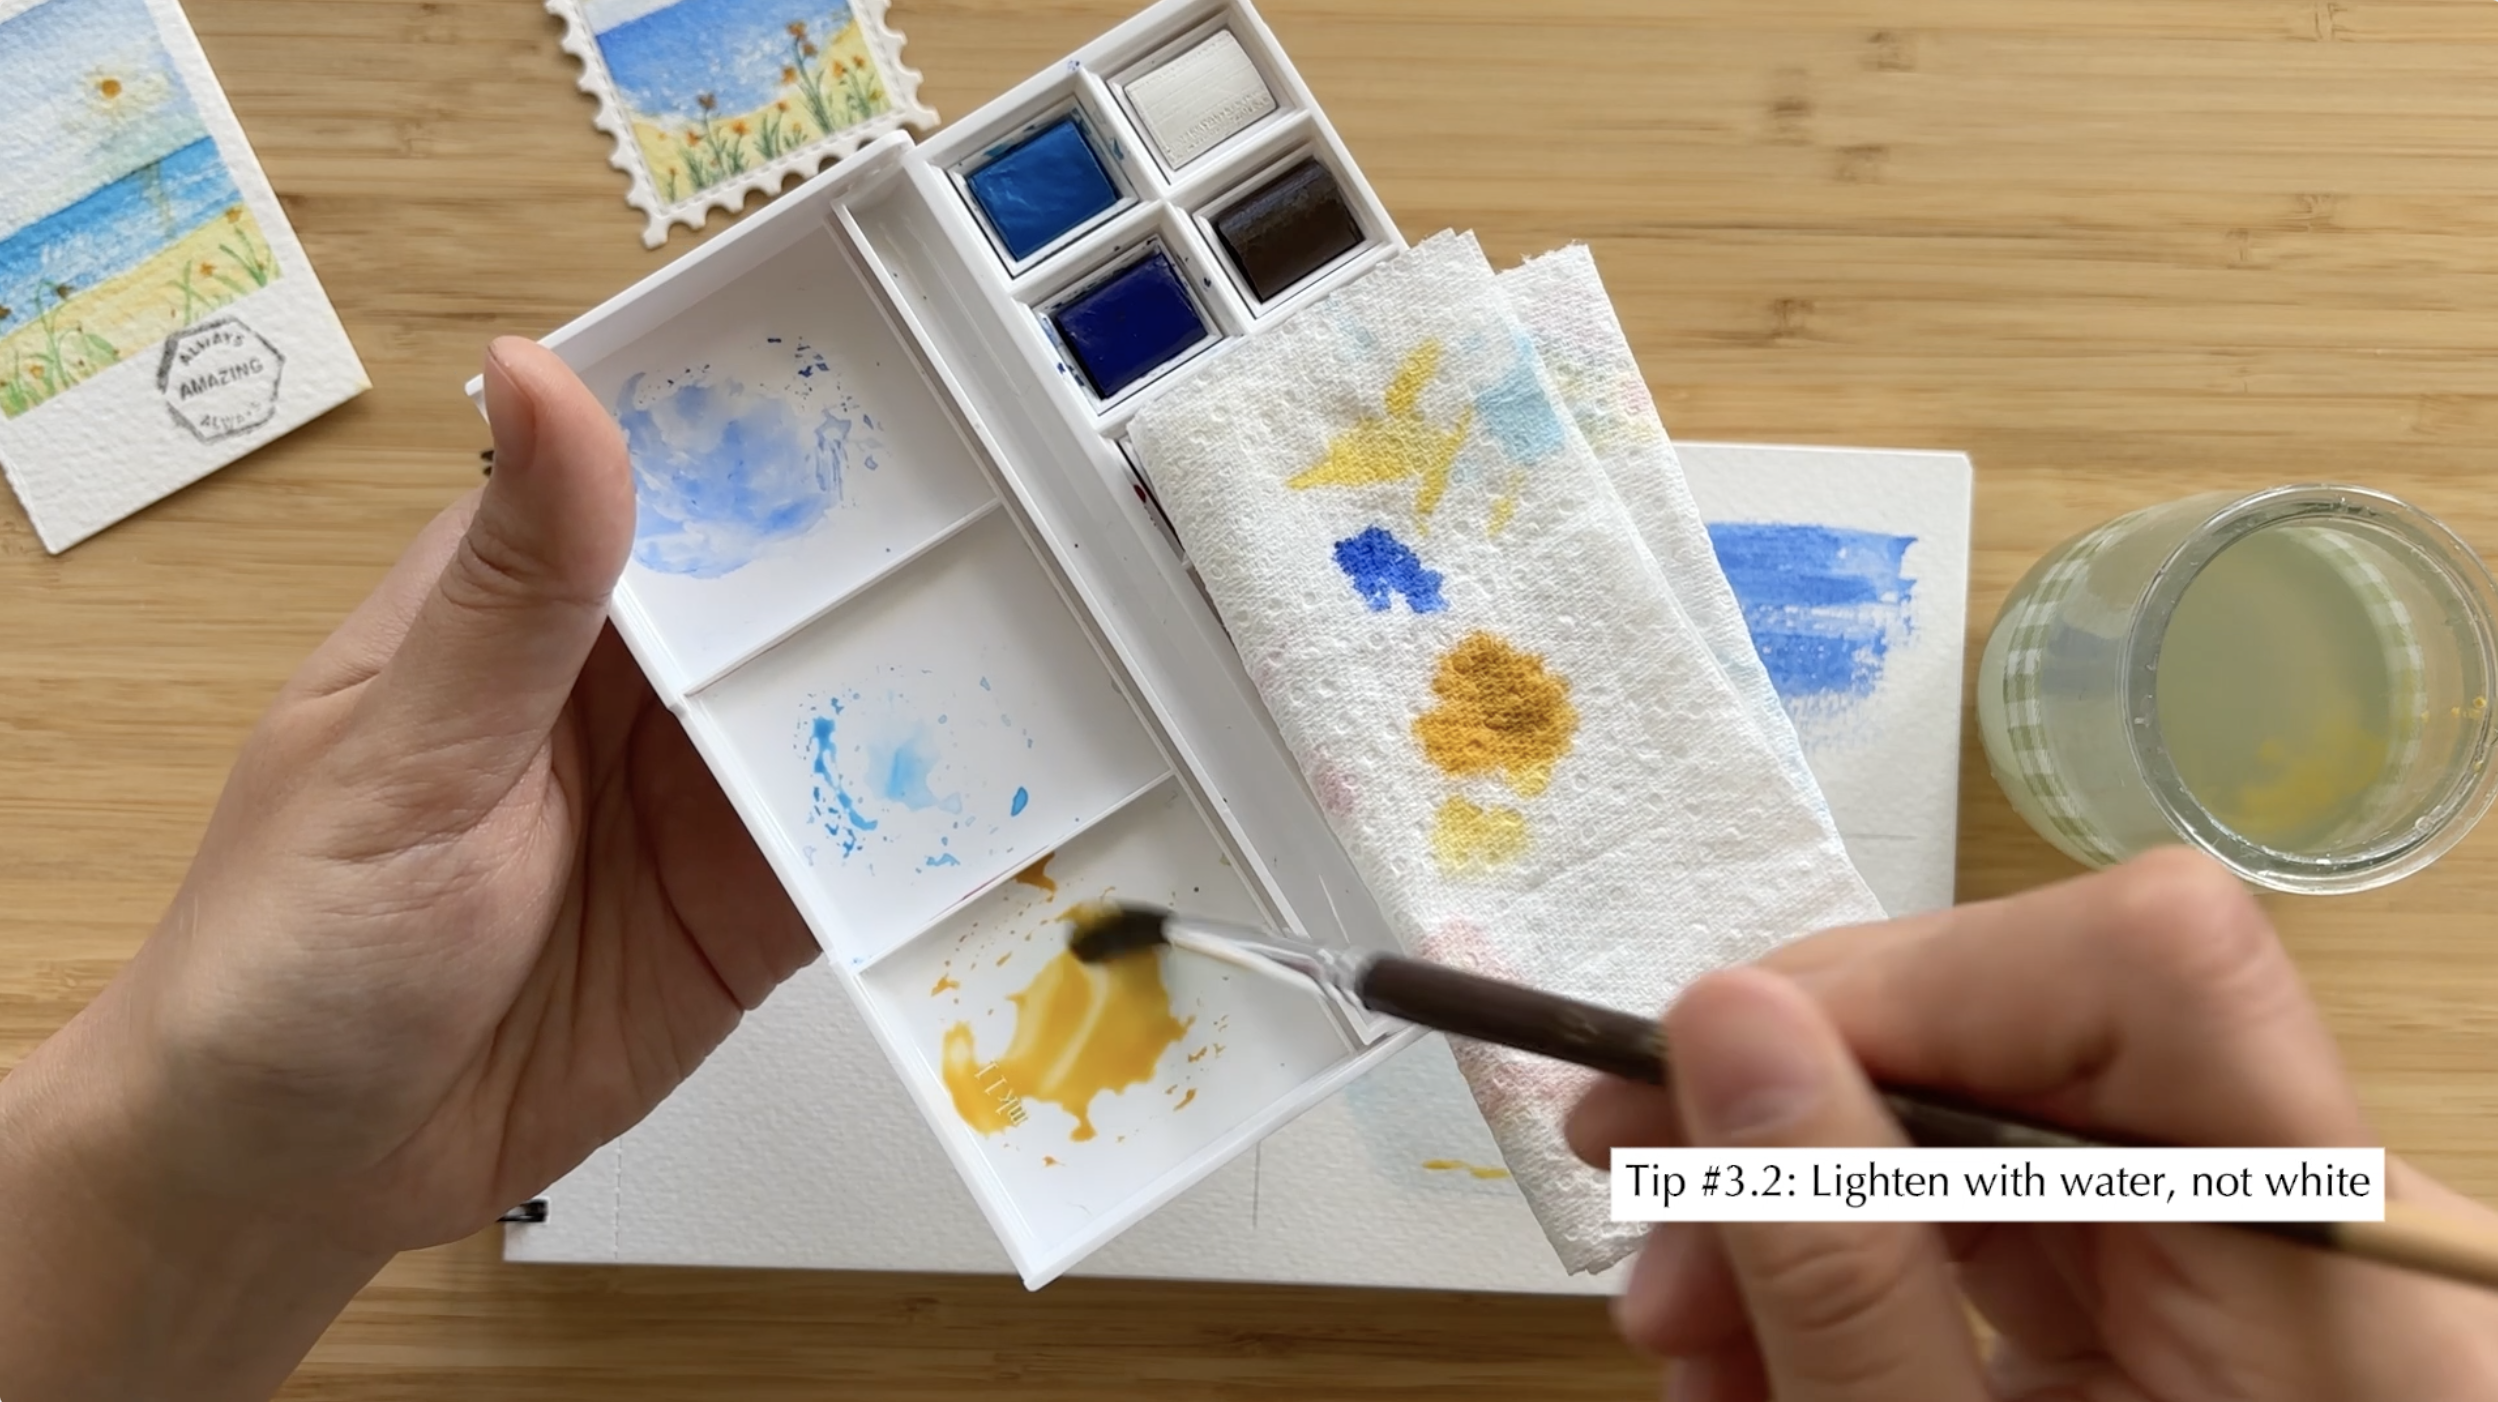
#3.2: Lighten with water, not white
Beginners may try to lighten colors by using white paint. But that makes your colors lose their transparency and look chalky. Instead, use water! Diluting the paint keeps it light and transparent. Adjust the water on your brush with a tissue until you get the right level of clarity. Now see how it creates this airy, and soft effect. It’s so much more luminous than using white paint.
Tip #4: use tissues for water control
Water control can be tricky, but here’s a little hack. Dab your brush on the tissue. If it leaves a big wet stain, you’ve got lots of water. With a moderate amount of water, the stain will spread a little bit. A relatively dry brush will barely leave any watermarks.

This quick check can save you so much frustration and make it way easier to control how much water you’re using as you paint.
Tip #5: paint clouds in a fun way
A tissue is all you need to paint fluffy white clouds!
Grab a tissue, crumple it, form a sharp little corner. Dab it on your paper while the paint is still wet. It lifts the paint and leaves fluffy white shapes that look just like clouds. It’s so quick and easy, and honestly, kind of fun to do. Try it out next time!

Tip #6: save white space on your paper
Did you know that in watercolor, the white you see is usually just the paper showing through?
For example, shimmering water or light reflections are often created by leaving white areas untouched instead of painting over them.

To get effects like sparkling lakes, just vary your brush pressure and speed to leave little gaps on the paper. It’s super easy once you get some practice. For softer effects, like gentle ripples in this painting, you can leave small spaces while painting. Or even use a clean, dry brush to lift paint and reveal the white underneath. It’s like a little magic trick, don’t you think?
Watercolor can be tricky, but these little tips make such a big difference. Let me know if you’ve experienced any of these moments or if you’ve learned these the hard way like I have.
Want to learn watercolor?
I made an online course that’s designed to help you build confidence, stay motivated, and have fun exploring watercolor essentials at your own pace.